If there is more than ONE (1) store in your organisation, you will likely be making use of what is called Head Office functionality. This allows one store in the group to act as the Head Office for the group and maintain various aspects of the system across all stores from a centralised place.
Below you will find details on the various functions and settings that are available to you as the Head Office of a group.
Viewing and Visibility
As the Head Office of a group, you may have access to the credentials required to login to the system under certain store's details and view the system from their point of view. That is not, however, the only way to view information relating to a specific store.
In various areas of the system such as Product Maintenance, Ordering, Stock Transfers etc... you will have access to a Change store... dropdown in the top right of the screen.

By default when logged into the Head Office store, you are seeing information for records at your Head Office store. By choosing a different store in the group from this dropdown however, you will be able to view those modules as if you were logged into the store's system directly.
Configuration
When viewing the Config module from Head Office, there are some additional configuration options available that are relevant only to a group of stores and are not covered in the Back Office Functions -> Configuration section of this Help File. Please see that section for more details. Below you will find information on Head Office specific configuration settings.
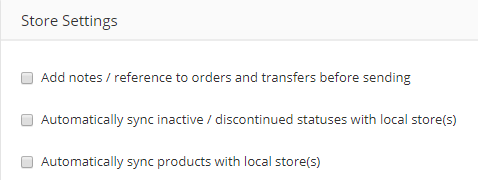
- Store Settings
Automatically sync inactive/discontinued statuses with local store(s)
This tick box can be selected to ensure that if a product is marked as inactive/discontinued at HO it will automatically sync that status with all Local Stores.
Automatically sync products with local store(s)
This tick box can be selected to ensure that any product that is created or changed at Head Office will automatically sync with Local Stores.
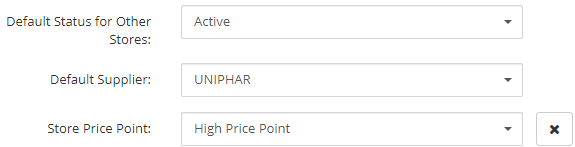
- Default Status for Other Stores: This is used to set the status of products as they are created in HO. Using the drop-down we can select from active, discontinued, dormant and inactive.
- Application Roles
Application Roles function in the same way as laid out in the Staff section of this help. However, there is additional functionality for group customers to be aware of.
Head Office and Local Store
In a group situation, the system comes pre-populated with two additional Application Roles for use in controlling permissions:
- Head Office
- Local Store
The Head Office Application Role is extremely important because it controls what is permissible across the entire group. If a function e.g. Can Dispense Controlled Drugs is disabled under the Head Office Application Role then no one, anywhere in the group can use that functionality. If it is enabled, then all other stores and all staff member can use that function. However, at the store level or at the staff member, this function may still be disabled. Head Office therefore, where a setting is enabled in HO allows the local stores and the staff the choice to enable the setting if they wish, but if it's disabled in HO, no one else gets a choice.
The Local Store Application Role is another important piece because this controls what is allowed in stores that are not Head Office. A good example of this would be around Can Create New Products - you may wish to prevent Local Stores from creating new products as you may wish to control this exclusively from Head Office. In this case your Head Office Application Role will have that setting enabled so that Head Office can do it. Then you will want to have the Local Store Application Role disabled so that the Local Stores cannot do it.
These two Application Roles sit on top of the Staff Roles already present in the system. This allows you to have finely detailed control over who can do what in the system, however this can be somewhat confusing at first.
The best way to think about these rules is to think of them as a hierarchy with Head Office at the top:
1. Head Office
    2. Local Office
        3. Staff Roles
Product Maintenance
- General Information
- To access the General Information of any product you can enter in either the name of the active product or barcode into your product search field.

- Selecting a store
To view a store's product information, we can select the drop-down and choose the pharmacy that you wish to view the product information for. Here, you can also update product information for this specific store.
By default, this defaults to blank and this means by default you will be looking at the records for that product in Head Office. Depending on your sync settings in Config you may be setup to automatically synchronise changes you make at Head Office with local stores. You may also need to change something specific to only one store, e.g. a store who is ordering a product from a local supplier because it is cheaper or faster to deliver.
Ordering
- Cross Orders
LOREM IPSUM
- Waiting to be Approved tab
This tab only features in Head Office Stores of multi-store organisations
As explained in the Important to Note section, we can configure stores in multi-store organisations to require approval from Head Office before any orders can be sent to the wholesaler
In this tab, Head Office shops approve and transmit all orders sent from the branches.
Head Office can also add products to orders as they wish.
Please Note: In the "Orders" option in multi-store Head Office there is a dropdown list where a user logged into Head Office can go directly to the ordering screen for each branch and immediately be logged into the ordering option of the selected branch

- Approve Order(s) from Head Office
- Select the Waiting to be Approved tab in the Orders Module.
- The screen displayed below will appear

- Begin by selecting the supplier of the order(s) you are looking to approve
- The' Sales From' and 'Sales To' dates default to 8 weeks ago and the current date. All sales made in this period will then be used in the 'Overstocked' or 'Overage' calculation
- Enter a stock buffer. This is set to 20% by default. This is also used in the 'Overstocked' or 'Overage' calculation
- Then select the store(s) that sent the order you wish to approve. Leave this field blank to select all stores
- A screen similar to the one displayed below will then appear

- Note that each product ordered is listed with respect to every branch you selected in the original screen, regardless of whether the store has ordered this product or not. This allows us to add any of the products listed to an order of a branch that may not have ordered this product originally. To do this click Order and enter the quantity of the product you wish to order
There are a number of things we can do to alter the order from this page
- To add a new product to the order search the product name in the search box at the top of the screen.
- Once the product has been selected the dialog box displayed below will appear.
- Enter the quantity of the product you wish to order for each store.
- Click Add to Order once you are satisfied with the information you have entered

- You can also change the quantity being ordered in the 'to Order' text field
- Use the overage amount that Rx 365 has calculated for each product to gauge whether the product should be ordered or not. That is, if there is any overage the product should not be ordered but should be transferred from that store to a store with a requirement for that product. This is automatically done by the system, as detailed below
- Once you are satisfied with all the order information you can click the Send/Transfer button
- If there are any products with overages that can be transferred between branches rather than being ordered from a wholesaler, the system will notify you once this button is selected and a screen similar to that displayed below will appear

- Simply select the products that you wish to transfer and click "Create/ Send" to send the Transfer Request to the branch with the overage.
- Any products that have not been ticked will be ordered instead.
Exporting and Syncing
LOREM IPSUM
Staff Members
- Searching and Filtering Staff Members
- To view staff members open Rx 365
- Select the Config module

- Select Staff members located on the left-hand side in the drop-down menu.

- By default, this will show all active staff members
- To show all staff members select the Show all Staff button

- To use the quick search function, start typing in the employee's name into the search box

- Alternatively, select the Filter button to enter in specific details pertaining to the employee
- Select Apply Filter to search using the filters selected

- To print the staff members page select the print icon located on the top right of the screen

- Assigning Staff Members to multiple Stores
If you have some staff who work in more than one store in the group, they will need a Staff Role assigned to them for each store they need to use the dispensary software in.
In order to
LOREM IPSUM